 Save
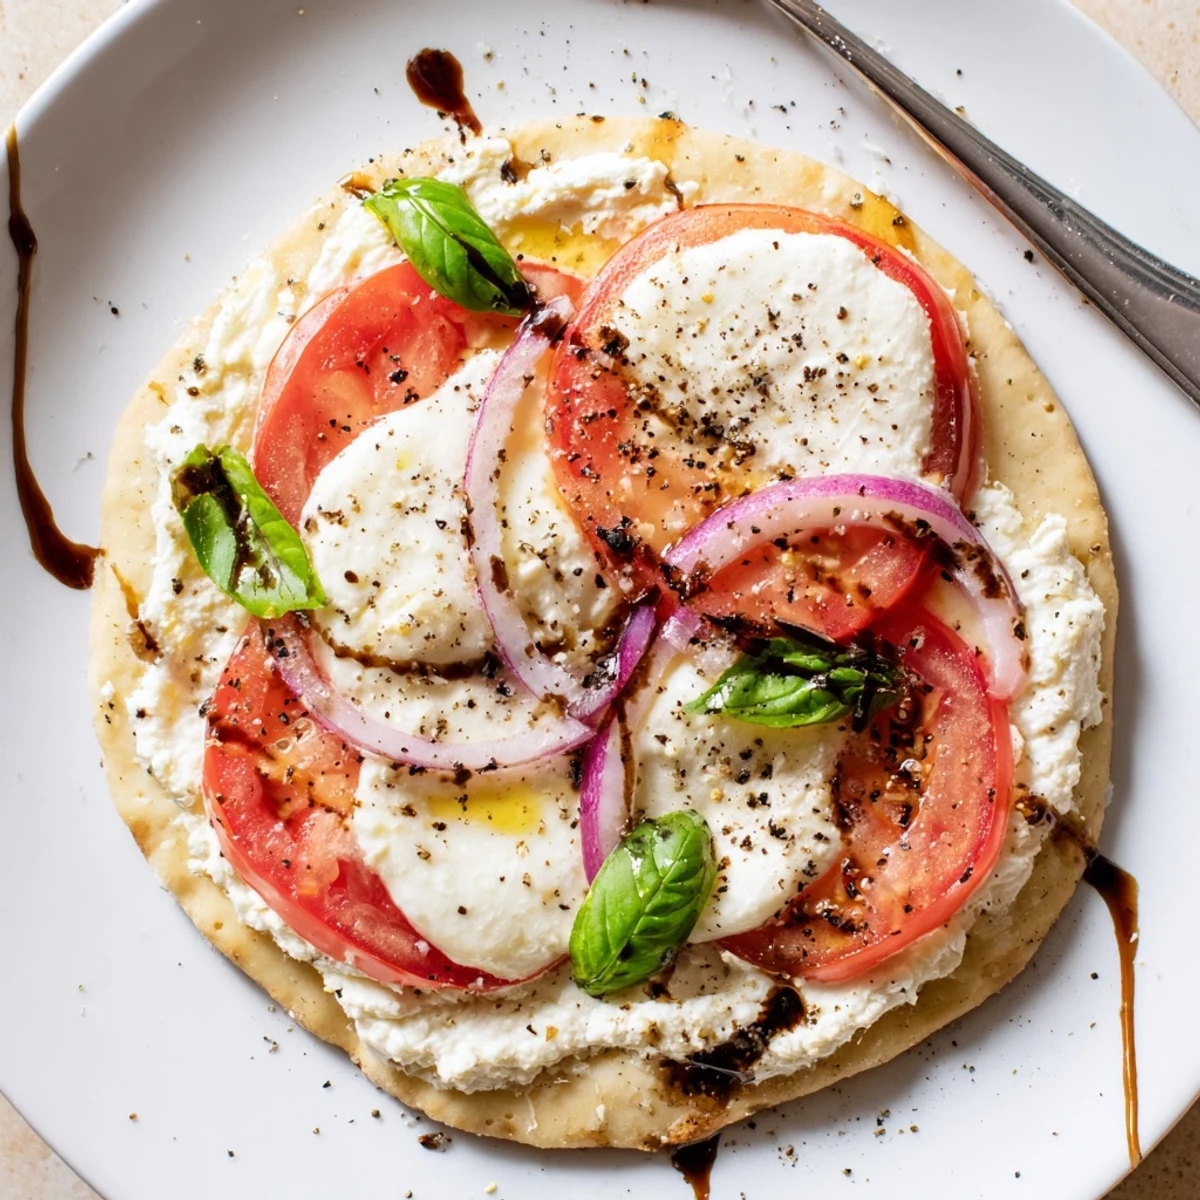
Save This Caprese-style pita comes together in about 30 minutes and serves four. Blend feta, cream cheese, garlic, lemon and olive oil until silky, then brush pitas with oil and spread the whipped feta. Top with mozzarella and tomato slices and bake 8–10 minutes until cheese melts and edges brown. Finish with fresh basil and a light balsamic drizzle for bright, savory contrast.
The scent of garlic mingling with feta always reminds me of weekends when I'm craving something fast but far from boring. One rainy afternoon, with a half-full jar of feta and too many ripe tomatoes threatening to overstay their welcome, I decided to try topping warm pita with all my Caprese favorites and a cloud of garlicky whipped cheese. It was the satisfying crunch of the edges as I sliced through my first attempt that made this dish an unexpected household staple. Now, I find myself whipping up these Caprese pita pizzas whenever I want to brighten up a tired day.
Just last month, I assembled a tray of these pizzas for neighbors who dropped by unexpectedly. The kitchen was a happy blur of chatter, basil leaves, and hands sneaking in for early tastes before the pizzas hit the oven. No one cared that some slices had extra cheese or that fresh basil was a last-minute save from my window box. That spontaneity – paired with gooey mozzarella – felt like the real magic.
Ingredients
- Feta cheese (200 g, crumbled): Choose a tangy block and crumble it yourself for best texture, avoiding the pre-crumbled tubs if you can.
- Cream cheese (60 g, softened): Softening on the counter helps it blend into the feta for that dreamy whipped effect.
- Garlic (1 clove, minced): Go for a small, fresh clove – just a little makes the flavor pop without overpowering.
- Extra-virgin olive oil (2 tbsp for feta; 2 tbsp for brushing): The olive oil adds richness to the spread and crisps the pita’s underside for a golden base.
- Lemon juice (1 tbsp): A splash brightens up the feta and balances the richness.
- Black pepper, freshly ground: Add to taste – it perks up the cheese blend and ties the flavors together.
- Pita breads (4 round): Use fluffy fresh rounds or toast day-olds to reinvigorate them for that crisp-tender base.
- Fresh mozzarella cheese (250 g, sliced): Drained and patted dry a bit so the pizzas don’t get soggy while baking.
- Ripe tomatoes (2 large, thinly sliced): Juicy summer tomatoes are ideal, but even sturdy hothouse ones work in a pinch.
- Red onion (1 small, thinly sliced, optional): Adds a mild bite and beautiful color, but can be skipped if preferred.
- Fresh basil leaves (1 handful): Tear just before serving for the brightest flavor and most aroma.
- Salt and black pepper: A sprinkle just before baking keeps the tomatoes lively and seasoned.
- Balsamic glaze (for drizzling, optional): Just a little brings a sophisticated tang and glistening finish to each slice.
Instructions
- Prep the Oven and Sheet:
- Preheat your oven to 220°C (425°F) and line a baking sheet with parchment paper – this keeps pita bottoms golden but not burnt.
- Whip the Garlic Feta:
- Combine feta, cream cheese, garlic, 2 tbsp olive oil, lemon juice, and a grind of black pepper in a food processor; blend until smooth and irresistibly creamy, scraping the bowl as needed.
- Prep the Pitas:
- Arrange pita rounds on the baking sheet and brush each one lightly with olive oil, paying special attention to the edges for extra crisp corners.
- Slather the Spread:
- Generously dollop and gently spread 2–3 tablespoons of whipped garlic feta on each pita, covering the surface for a creamy base.
- Layer and Season:
- Lay on mozzarella slices, tuck in tomatoes, and scatter red onion if you like; season with a bit of salt and a few grinds of pepper.
- Bake to Bubbly:
- Slide the tray into the oven and bake for 8–10 minutes, until the cheese melts and pita edges start to crisp and brown.
- Finish and Serve:
- Let the pizzas cool just enough to handle, then crown each with fresh basil and a drizzle of balsamic glaze if you’re feeling fancy; slice and eat while still warm and inviting.
 Save
Save I realized how much this recipe had woven itself into my kitchen when my best friend started requesting it for movie nights. Something about the mix of warm cheese and sharp, lemony feta had us pausing the film just to savor every cheesy, crispy bite together.
Mastering the Whipped Feta Spread
A quick blitz in the food processor is all it takes to make the feta impossibly creamy. Using block feta (not pre-crumbled) really makes the texture extra rich and spreadable. I like to sneak a taste straight from the bowl and adjust the lemon or pepper if I’m feeling bold.
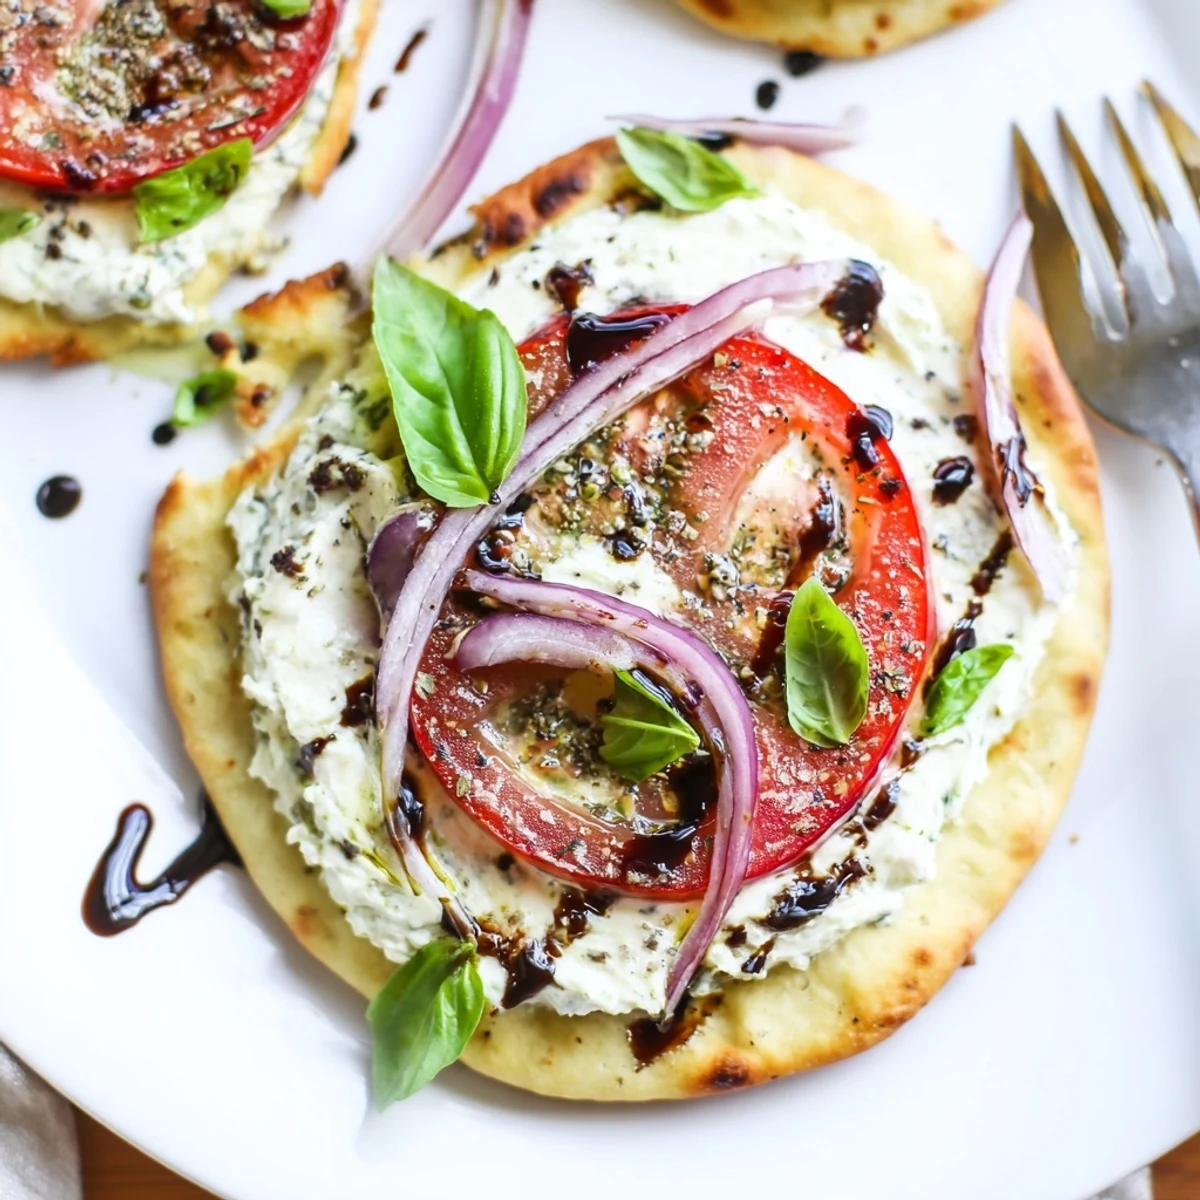
Getting Pita Pizzas Golden and Crisp
The trick to those golden edges is brushing the pitas with olive oil right up to the sides. Try stacking two pitas for a thicker, doughier base if you’re extra hungry, or just stick with singles if you love a cracker-crisp bite. Either way, keep an eye out during those last two minutes in the oven – they can go from golden to dark fast.
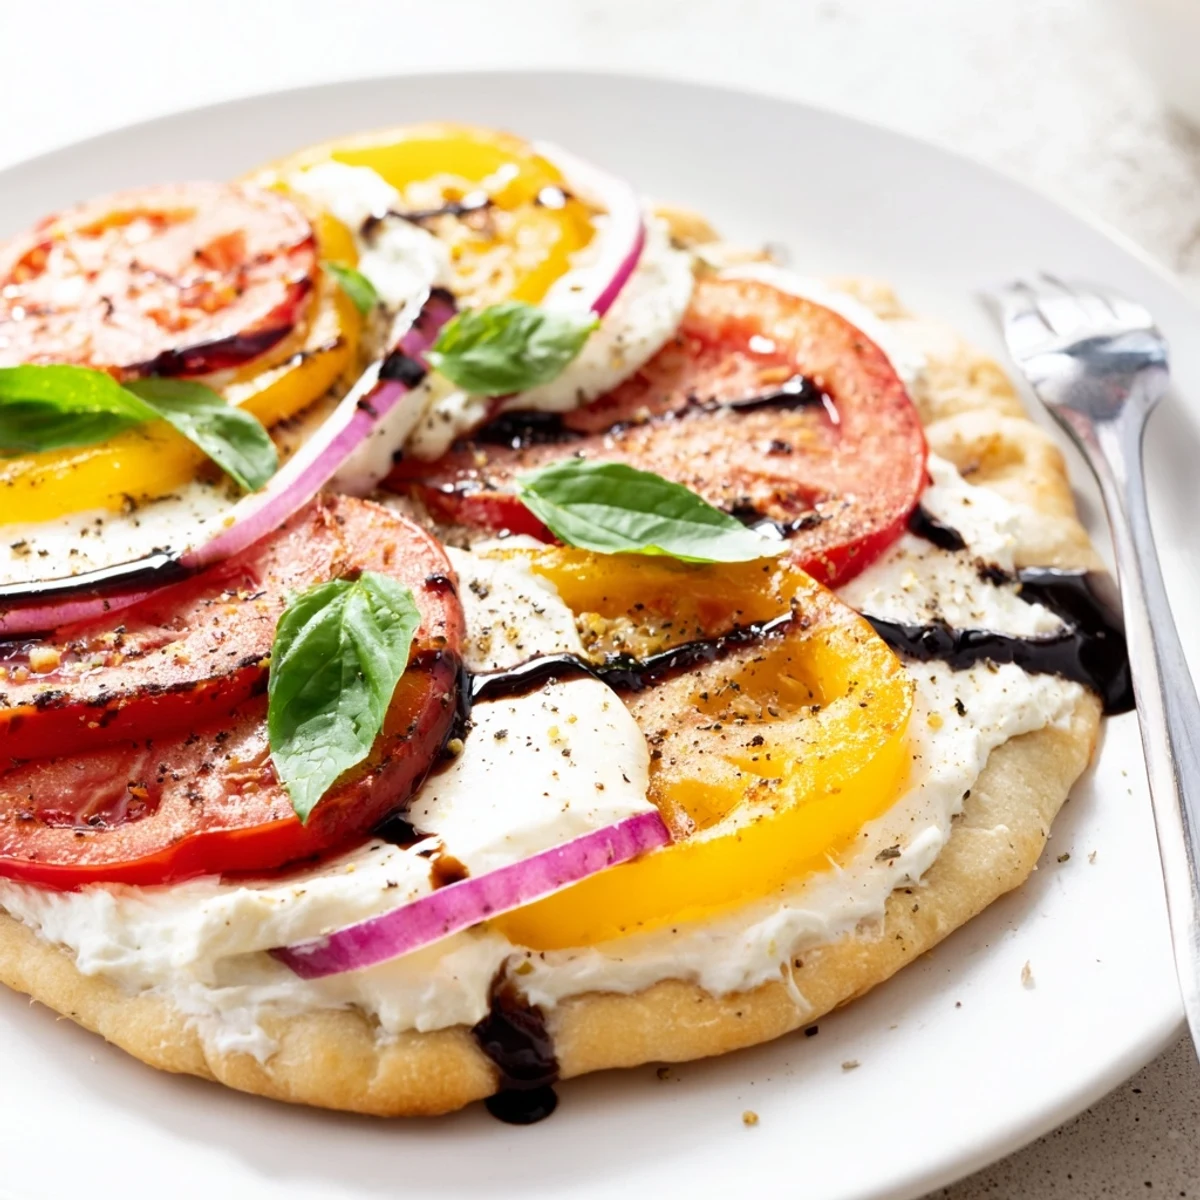
Bringing It All Together for Easy Entertaining
These Caprese pita pizzas are perfect for sharing and totally adaptable to what you have on hand. I’ve swapped in roasted peppers, a handful of arugula after baking, or even spicy honey drizzle instead of balsamic for a whole new vibe. Shape and top them together as a group project or let each person build their own – it always ends with smiles.
- If prepping ahead, keep the whipped feta in the fridge and assemble when ready.
- Don’t be shy with the basil; it mellows the garlic feta beautifully.
- Wait until just before serving to drizzle the balsamic so nothing gets soggy.
 Save
Save I hope these Caprese pita pizzas brighten your table as much as they have mine – they’re my go-to answer for something comforting, colorful, and just a little indulgent.
Recipe FAQs
- → Can I make the whipped garlic feta ahead of time?
-
Yes — prepare the whipped feta up to 48 hours in advance and store it in an airtight container in the fridge. Bring to room temperature and stir before spreading for the creamiest texture.
- → How do I get the pitas extra crispy?
-
Brush the pitas lightly with olive oil and bake on a preheated baking sheet or a hot pizza stone. Leaving a small gap between pitas and using high heat (220°C/425°F) helps edges crisp quickly without overcooking toppings.
- → What can I substitute for cream cheese?
-
For a lighter texture, use Greek yogurt strained in a cheesecloth for 1–2 hours, or swap in ricotta for a milder, slightly grainier spread. Adjust salt and lemon to taste.
- → Are cherry tomatoes a good alternative?
-
Absolutely — halved cherry tomatoes add concentrated sweetness and juiciness. They also reduce slicing time and distribute more evenly across each pita round.
- → How should leftovers be stored and reheated?
-
Store leftover pitas in the refrigerator, separated by parchment to prevent sogginess, for up to 2 days. Reheat in a 200°C/400°F oven for 5–7 minutes to refresh the crispness; avoid microwaving to prevent soggy bread.
- → Can this be adapted for dietary needs like gluten-free or vegan?
-
Use gluten-free pita or flatbread for a gluten-free version. For a vegan approach, substitute dairy with plant-based cream cheese and vegan feta, and choose a vegan mozzarella alternative; flavor and texture will vary slightly.
