 Save
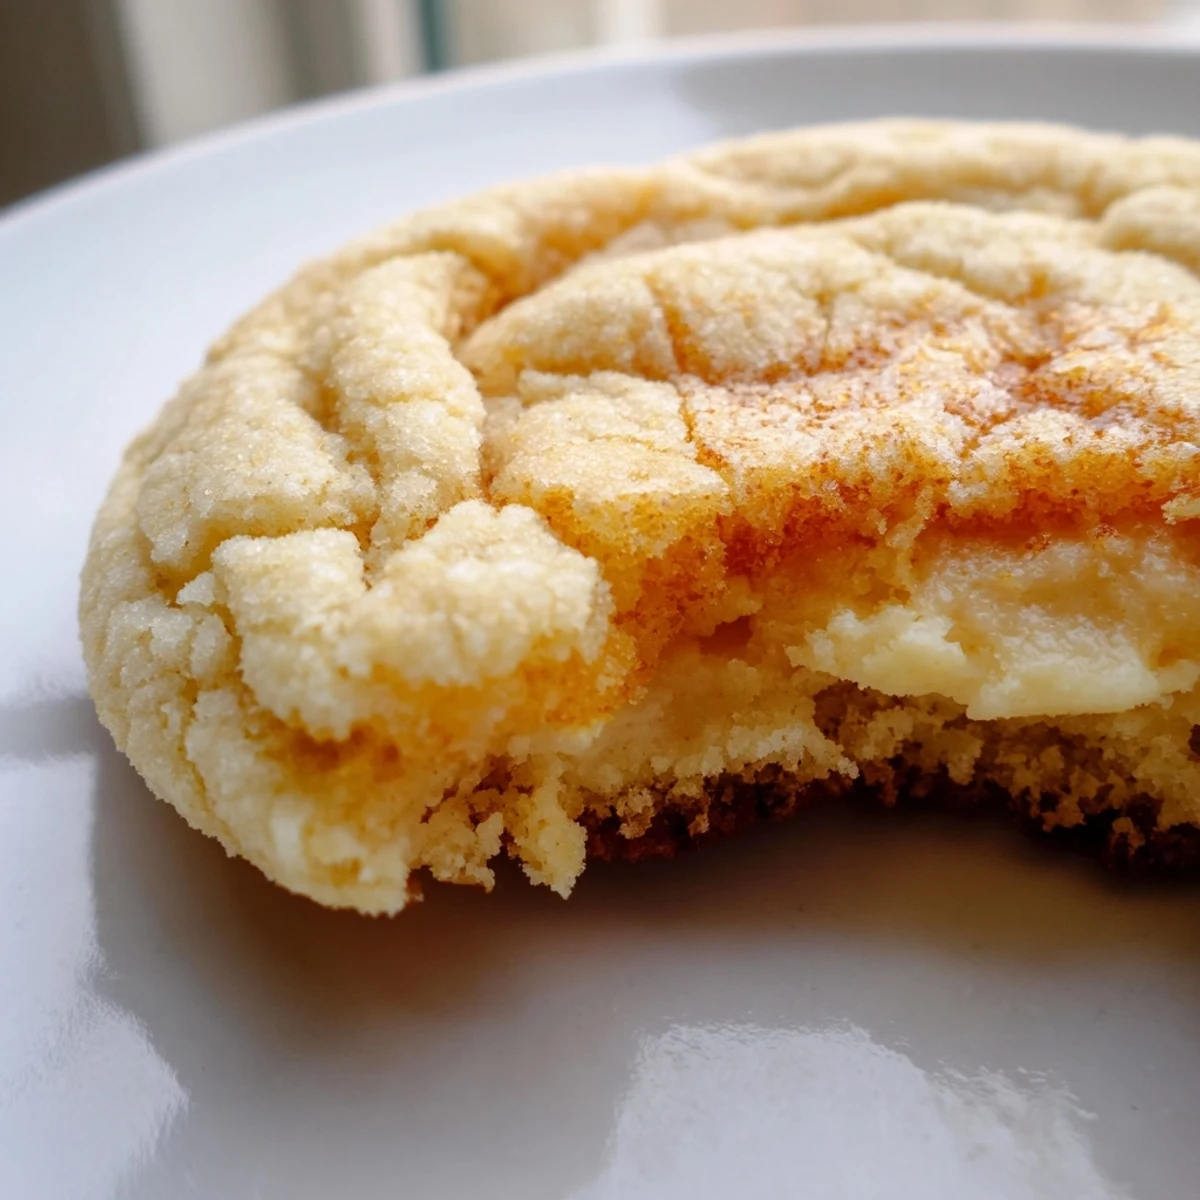
Save These soft baked cookies capture the essence of classic French crème brûlée in a handheld treat. The dough creates a tender, vanilla-scented base that encases a rich cream cheese filling. After baking, each cookie receives the signature finishing touch—a layer of sugar that's torched until golden and crackly, just like the traditional dessert.
The entire process takes about 40 minutes from start to finish, yielding 18 impressive cookies perfect for entertaining or special occasions. A kitchen torch creates the most authentic caramelized topping, though your oven broiler works as an alternative.
What makes these exceptional is the contrast of textures—the soft, pillowy cookie shell, the smooth vanilla filling, and the shattering crisp sugar layer on top. They're best enjoyed the same day they're made, when that caramelized topping is at its most pristine.
The smell of caramelized sugar always pulls me back to my first attempt at making crème brûlée. I cracked the caramelized top with my spoon, and that satisfying shattering sound became my new favorite kitchen noise. When I discovered I could tuck that same experience into a cookie, my entire dessert world shifted. Now these cookies bridge the gap between elegant French dessert and cozy after-school treat.
I brought a batch to my friend's dinner party last winter, and honest to goodness, the room went quiet when everyone bit through that caramelized sugar layer. Someone actually asked if I'd secretly bought them from a French bakery. Watching faces light up at that first crackle of sugar has become one of my favorite hosting moments.
Ingredients
- All-purpose flour: The structural foundation that holds everything together without getting tough
- Baking soda: Just enough lift to give these cookies a tender, cake-like crumb
- Salt: Essential for balancing all that sweetness and making flavors pop
- Unsalted butter: Softened to room temperature so it incorporates beautifully into the dough
- Granulated sugar: Creates the cookie base and later transforms into that magical caramelized crust
- Egg yolks: Skip the whites here—yolks add richness and help create that soft, tender texture
- Pure vanilla extract: Don't skimp here because vanilla is the backbone of the entire flavor profile
- Sour cream: The secret ingredient that keeps these cookies impossibly soft and adds subtle tang
- Cream cheese: Softened completely so it blends into a silky, smooth filling
- Vanilla bean paste: Those tiny vanilla specks look beautiful and taste incredible
- Extra granulated sugar: Reserved specifically for the torch moment at the end
Instructions
- Preheat your oven:
- Set it to 350°F and line two baking sheets with parchment paper so nothing sticks
- Whisk the dry ingredients:
- Combine flour, baking soda, and salt in a medium bowl, then set it aside
- Cream the butter and sugar:
- Beat them together until the mixture looks light and fluffy, about 2 to 3 minutes
- Add the wet ingredients:
- Mix in egg yolks, vanilla extract, and sour cream until everything is fully combined
- Combine everything:
- Gradually stir in the dry ingredients until a soft dough forms, being careful not to overmix
- Make the filling:
- Beat cream cheese, sugar, and vanilla bean paste in a small bowl until completely smooth
- Fill the cookies:
- Flatten 2 tablespoons of dough into a disc, place 1 teaspoon of filling in the center, then fold and pinch the dough to seal it shut
- Arrange and bake:
- Place cookies seam side down, spaced 2 inches apart, and bake for 11 to 13 minutes until edges are set but centers remain soft
- Cool completely:
- Let them rest on the pan for 10 minutes before moving to a wire rack to finish cooling
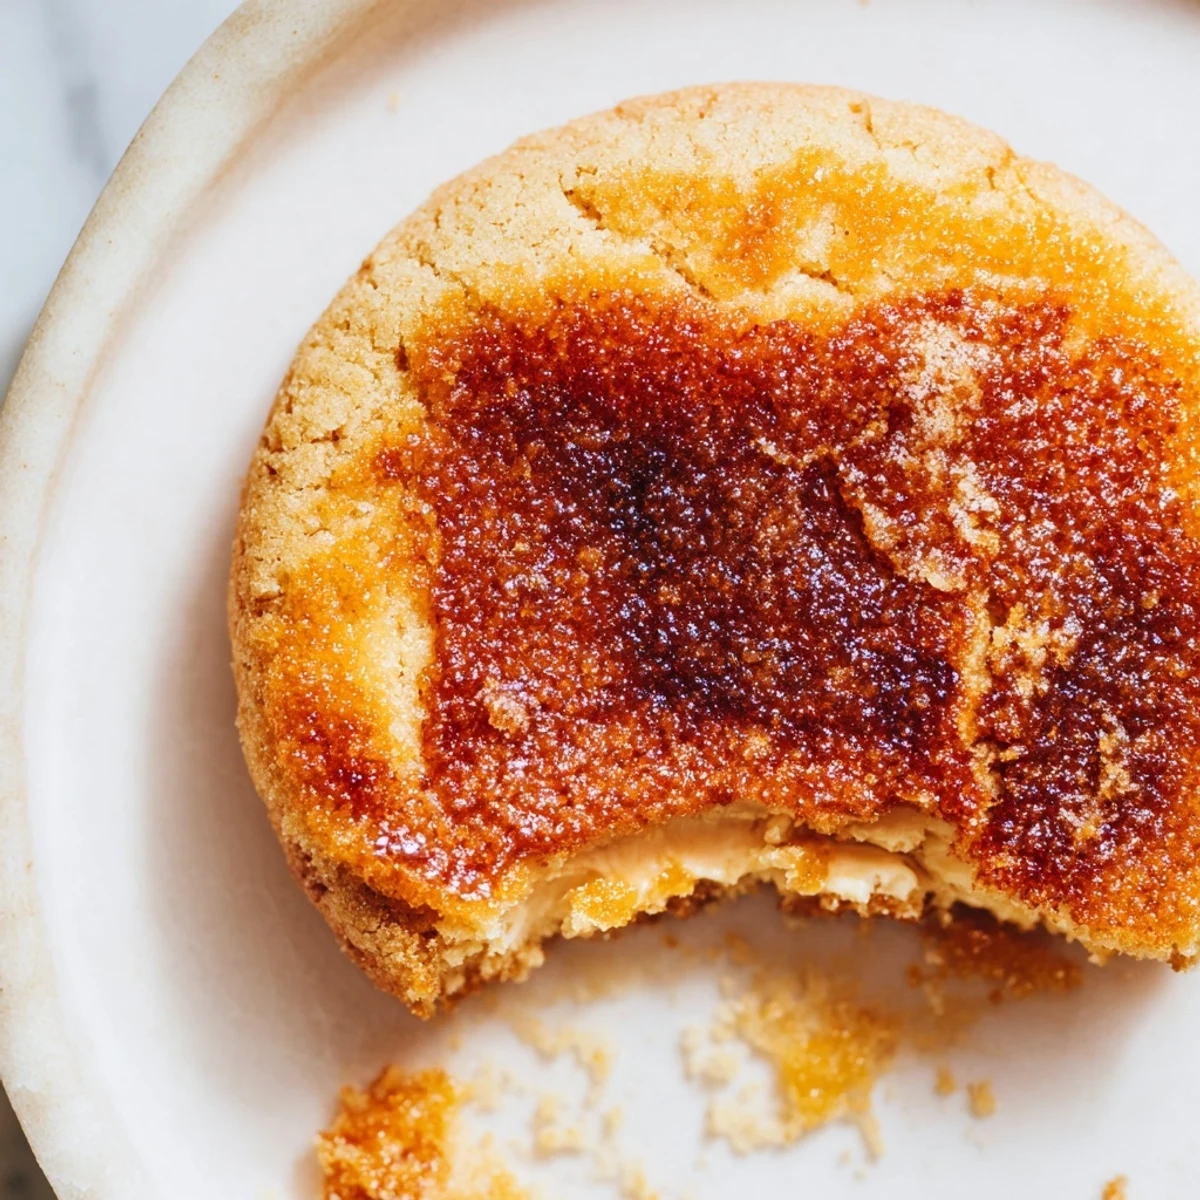
- Create the brûlée:
- Sprinkle a thin layer of sugar on each cookie and torch until golden and crisp, then wait 5 minutes before serving
 Save
Save My sister called me halfway through her first batch, panicked because her filling was oozing out. We laughed about it later, but now I always double-check those seals before anything goes in the oven. That tiny extra pinch of dough makes all the difference between a beautiful cookie and a kitchen experiment.
Getting That Perfect Torch
The sugar layer should be thin and even—thick patches take forever to caramelize and can burn before thinner areas even brown. Move the torch in slow circles, keeping it about 2 inches from the surface. The sugar will bubble, darken, and then suddenly harden into that gorgeous glass-like crust we're all here for.
Making Ahead
You can assemble and bake the cookies a day in advance, then torch the sugar topping right before serving. Store the undecorated cookies in an airtight container at room temperature. The brûlée topping loses its signature crunch overnight, so that final step should always happen just before eating.
Serving Suggestions
These cookies shine on their own, but a cup of strong coffee or a glass of cold milk cuts through the richness beautifully. I've also served them alongside fresh berries when I want to pretend I'm at a fancy brunch spot.
- A tiny pinch of sea salt on top after torching creates the most incredible sweet-salty contrast
- Warm the filled cookies for 10 seconds in the microwave before adding the sugar topping
- Leftovers (if they exist) are surprisingly good straight from the fridge the next morning
 Save
Save There's something almost meditative about torching that final layer of sugar, watching it transform from white to amber to deep golden brown. I hope these cookies bring you as much joy in the making as they do in the eating.
Recipe FAQs
- → Can I make the cookie dough ahead of time?
-
Yes, the dough can be prepared and refrigerated for up to 24 hours before baking. Let it come to room temperature for about 15 minutes before scooping and filling, as chilled dough may be too firm to work with easily.
- → Do I need a kitchen torch for the caramelized topping?
-
While a kitchen torch creates the most authentic crackly sugar crust, you can use your oven's broiler instead. Place the cooled cookies on a baking sheet and broil for 1–2 minutes, watching closely to prevent burning. The torch method gives more control and produces better results.
- → How should I store these cookies?
-
Store in an airtight container at room temperature for up to 2 days. Note that the caramelized sugar topping may soften slightly over time due to moisture from the filling. For best texture, enjoy them the same day they're made when the sugar layer is perfectly crisp.
- → Can I freeze the finished cookies?
-
Freezing isn't recommended because the caramelized sugar topping becomes sticky and loses its signature crunch when thawed. You can freeze the unfilled cookie dough balls for up to 3 months, then thaw, fill, bake, and torch when ready to serve.
- → What's the difference between vanilla extract and vanilla bean paste?
-
Vanilla bean paste contains actual vanilla bean seeds, providing those classic black specks and a more intense, complex vanilla flavor. Pure extract works perfectly fine as a substitute—use the same amount called for in the filling mixture.
- → Why does the recipe call for egg yolks instead of whole eggs?
-
Egg yolks create a richer, more tender cookie texture and add beautiful golden color. The extra fat from yolks contributes to the melt-in-your-mouth quality that mimics the luxurious mouthfeel of traditional crème brûlée custard.
