 Save
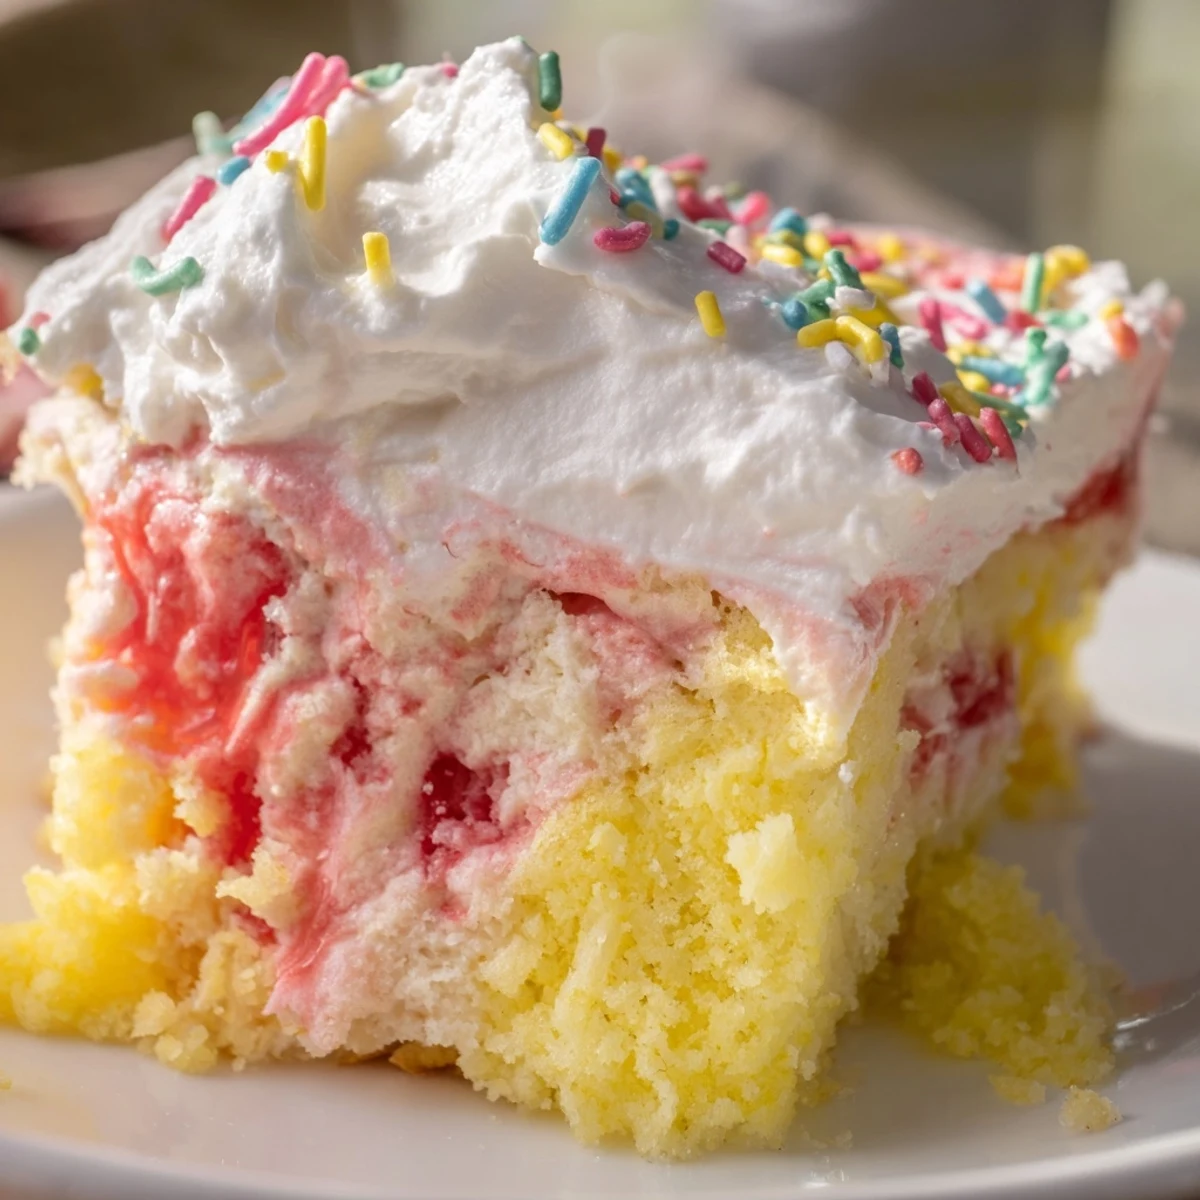
Save This vibrant spring dessert starts with a moist vanilla cake base, freshly baked until golden. After cooling slightly, the surface is dotted with evenly spaced holes that allow colorful strawberry and lemon gelatin to seep into every layer. The result is a beautifully marbled, incredibly moist cake that captures the essence of Easter celebrations. A cloud of freshly whipped cream, sweetened with powdered sugar and vanilla, crowns the creation. Pastel sprinkles or jelly beans add the perfect festive touch, making this an ideal centerpiece for spring gatherings and holiday feasts.
The first time I made a poke cake, I was honestly skeptical about poking holes in something I had just spent half an hour baking perfectly. But watching those colorful gelatin rivers seep into the warm cake changed my entire perspective on desserts. There is something absolutely delightful about a cake that gets more interesting with every step, and this Easter version became my go to for spring gatherings the moment my niece declared it the most fun cake she had ever seen.
Last Easter, my neighbor Sarah brought over her grandmother is vintage pastel platter and asked if I could make something that would look like it belonged in a 1950s magazine. When I brought out this cake with its swirled pink and yellow patterns peeking through clouds of whipped cream, she actually teared up. Sometimes food is not just about taste, it is about creating something that makes people feel like they are stepping into a cherished memory.
Ingredients
- Vanilla cake mix (15.25 oz/432 g): While I usually bake from scratch, poke cakes actually work beautifully with box mix because the texture is sturdy enough to hold all that gelatin without collapsing
- Water (1 cup/240 ml), vegetable oil (1/3 cup/80 ml), and 3 large eggs: These are your standard cake mix ingredients, but do not skip the oil because it keeps the cake moist enough to absorb the gelatin without getting soggy
- Strawberry and lemon gelatin (3 oz/85 g each): The pink and yellow combination screams Easter, but I have also used berry blue and lime for a more tropical vibe that works surprisingly well
- Boiling and cold water (2 cups/480 ml each, divided): The hot water dissolves the gelatin completely while the cold water brings it to the right temperature for pouring into the cake
- Heavy whipping cream (2 cups/480 ml), powdered sugar (3 tbsp), and vanilla extract (1 tsp): Homemade whipped cream is infinitely better than the tub stuff, and adding the sugar gradually while beating prevents that grainy texture
- Pastel sprinkles or jelly beans: Completely optional but honestly mandatory if you want that full festive Easter experience
Instructions
- Bake your canvas:
- Preheat your oven to 350°F (175°C) and grease a 9x13 inch pan with real butter or cooking spray. Mix up that vanilla cake batter according to the package directions, pour it in, and let it bake for about 28 to 32 minutes until a toothpick comes out clean and the kitchen smells like vanilla heaven.
- Create the magic holes:
- Let the cake cool for exactly 15 minutes because you want it warm but not hot. Take a wooden spoon handle or a skewer and poke holes all over the cake, about an inch apart, pressing down gently but firmly until you hit the bottom of the pan.
- Prepare the gelatin:
- In two separate bowls, dissolve each gelatin packet in 1 cup of boiling water, stirring until you cannot see any granules anymore. Add 1 cup of cold water to each bowl and let them cool slightly while you admire the bright colors.
- Infuse the cake:
- Pour the strawberry gelatin over one half of the cake and the lemon over the other half, watching as it disappears into those little holes you made. If you want a marbled look, you can pour them in alternating patches across the entire cake.
- Chill thoroughly:
- Cover the pan and refrigerate for at least 2 hours, though overnight is even better because the flavors really meld together. This is the hardest part because the kitchen starts smelling amazing and you just want to dive in immediately.
- Add the crowning glory:
- Whip that cold heavy cream with the powdered sugar and vanilla until you have stiff peaks that hold their shape when you lift the beaters. Spread it generously over the entire cake, making sure to cover every bit of colorful gelatin underneath.
- Finish with festivity:
- Sprinkle those pastel sprinkles or arrange jelly beans on top however makes you happy. Slice into squares and serve cold, watching everyone is face when they take that first bite and discover the hidden colorful layers inside.
 Save
Save My sister in law asked for the recipe after Easter dinner, then called me three days later to confess she had made it again just because her husband kept talking about it. There is something incredibly satisfying about a dessert that looks impressive but is actually so straightforward to put together.
Making It Your Own
I have discovered that the gelatin combinations are practically endless if you want to switch things up for different occasions. Berry blue and raspberry work beautifully for July 4th, while orange and lime create a stunning autumn version that feels like sunset in cake form. Sometimes I even use clear gelatin and add food coloring to match whatever color scheme my daughter is currently obsessed with for her birthday.
The Science Behind the Magic
What makes poke cakes so brilliant is that the gelatin actually bonds with the cake structure while adding moisture that does not make the dessert soggy. The protein in the gelatin forms a gentle network within the cake is crumb, creating those distinct colorful pockets that burst with fruit flavor when you bite into them. It is essentially a molecular gastronomy technique that any home cook can master without any fancy equipment or science degree.
Serving and Storage Tips
This cake actually improves with a little time in the refrigerator because the flavors have a chance to mingle and develop deeper notes. I have served it at everything from casual potlucks to somewhat fancy Easter brunches, and it disappears equally fast at both.
- Cut the cake while it is very cold for the cleanest squares that look like they came from a bakery
- Keep any leftovers covered in the refrigerator because the whipped cream does not hold up well at room temperature
- The cake will keep for about 3 days though I have never personally seen it last longer than 24 hours in my house
 Save
Save There is something wonderfully nostalgic about a poke cake, even though it feels fresh and exciting every time I make it. Hope it brings as much colorful joy to your table as it has to mine.
Recipe FAQs
- → How far in advance can I make this?
-
You can prepare this up to 24 hours ahead. The gelatin needs at least 2 hours to set properly, and the flavors actually develop beautifully when chilled overnight. Store covered in the refrigerator until ready to serve.
- → Can I use different gelatin flavors?
-
Absolutely! Berry blue, lime, orange, or raspberry work wonderfully. Choose colors that match your celebration theme or stick with traditional spring pastels for Easter gatherings.
- → What's the best way to poke the holes?
-
Use a wooden spoon handle or round skewer, spacing holes about 1 inch apart across the entire surface. Press through completely but avoid tearing the cake bottom. This creates perfect channels for the gelatin to infuse.
- → Can I make whipped cream ahead?
-
Whipped cream is best prepared just before serving for optimal texture. However, you can stabilize it by adding a bit of unflavored gelatin or using whipped topping instead if you need to prepare everything several hours in advance.
- → How should I store leftovers?
-
Cover tightly with plastic wrap or transfer to an airtight container. Refrigerate promptly and consume within 3-4 days. The gelatin keeps the cake moist, so leftovers remain delicious.
- → Can I use homemade cake instead of mix?
-
Yes, a from-scratch vanilla cake works perfectly. Just ensure it's a standard 9x13-inch recipe. The key is a slightly denser crumb that will hold the gelatin without becoming soggy.
