 Save
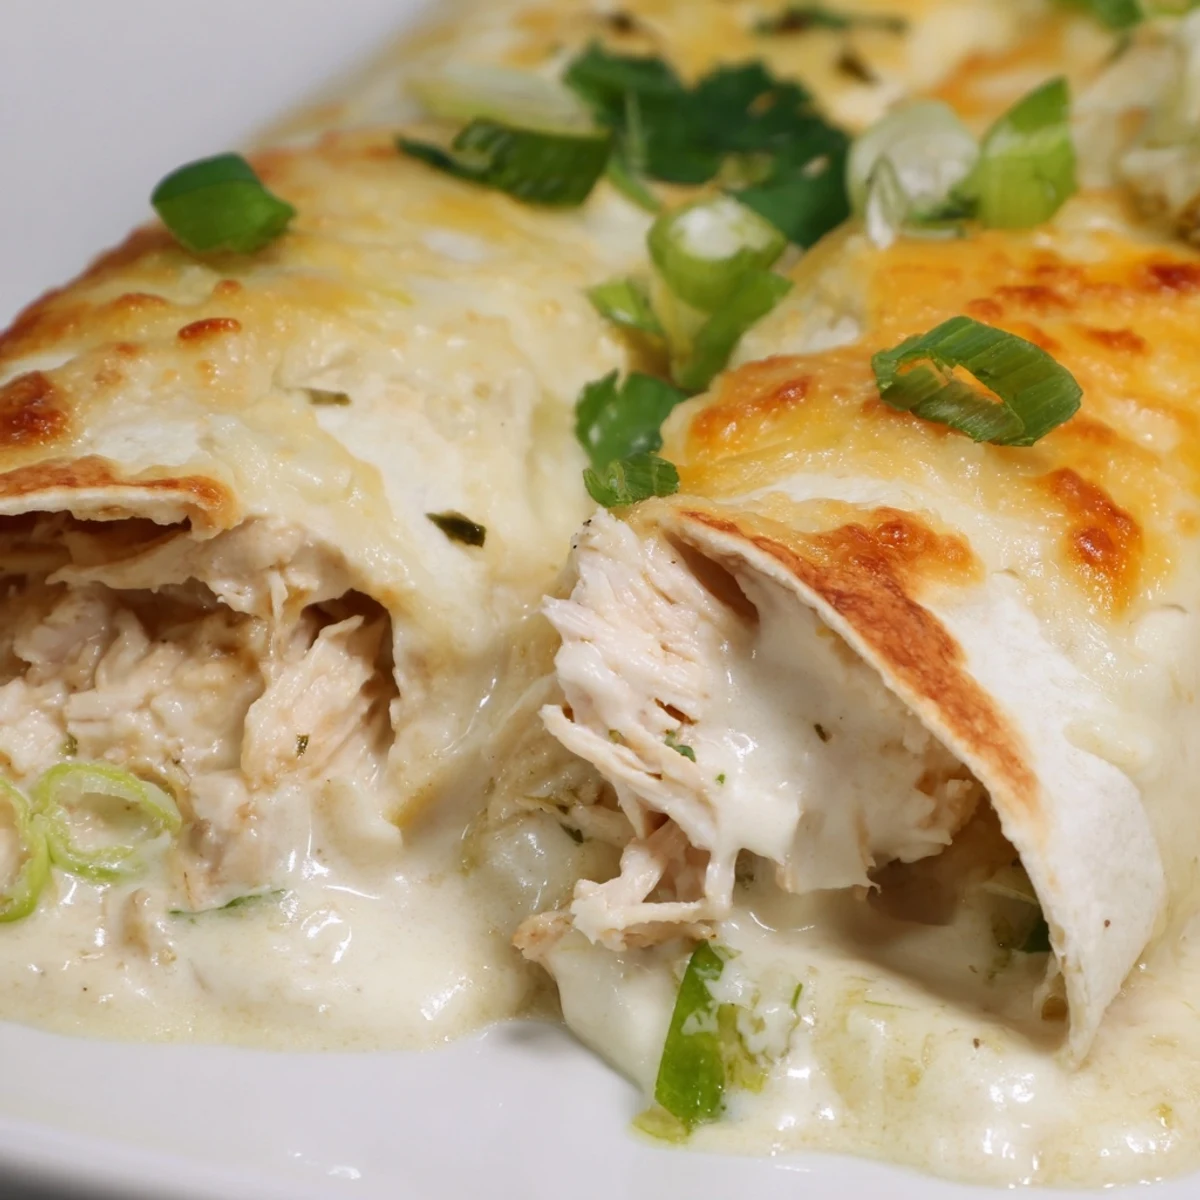
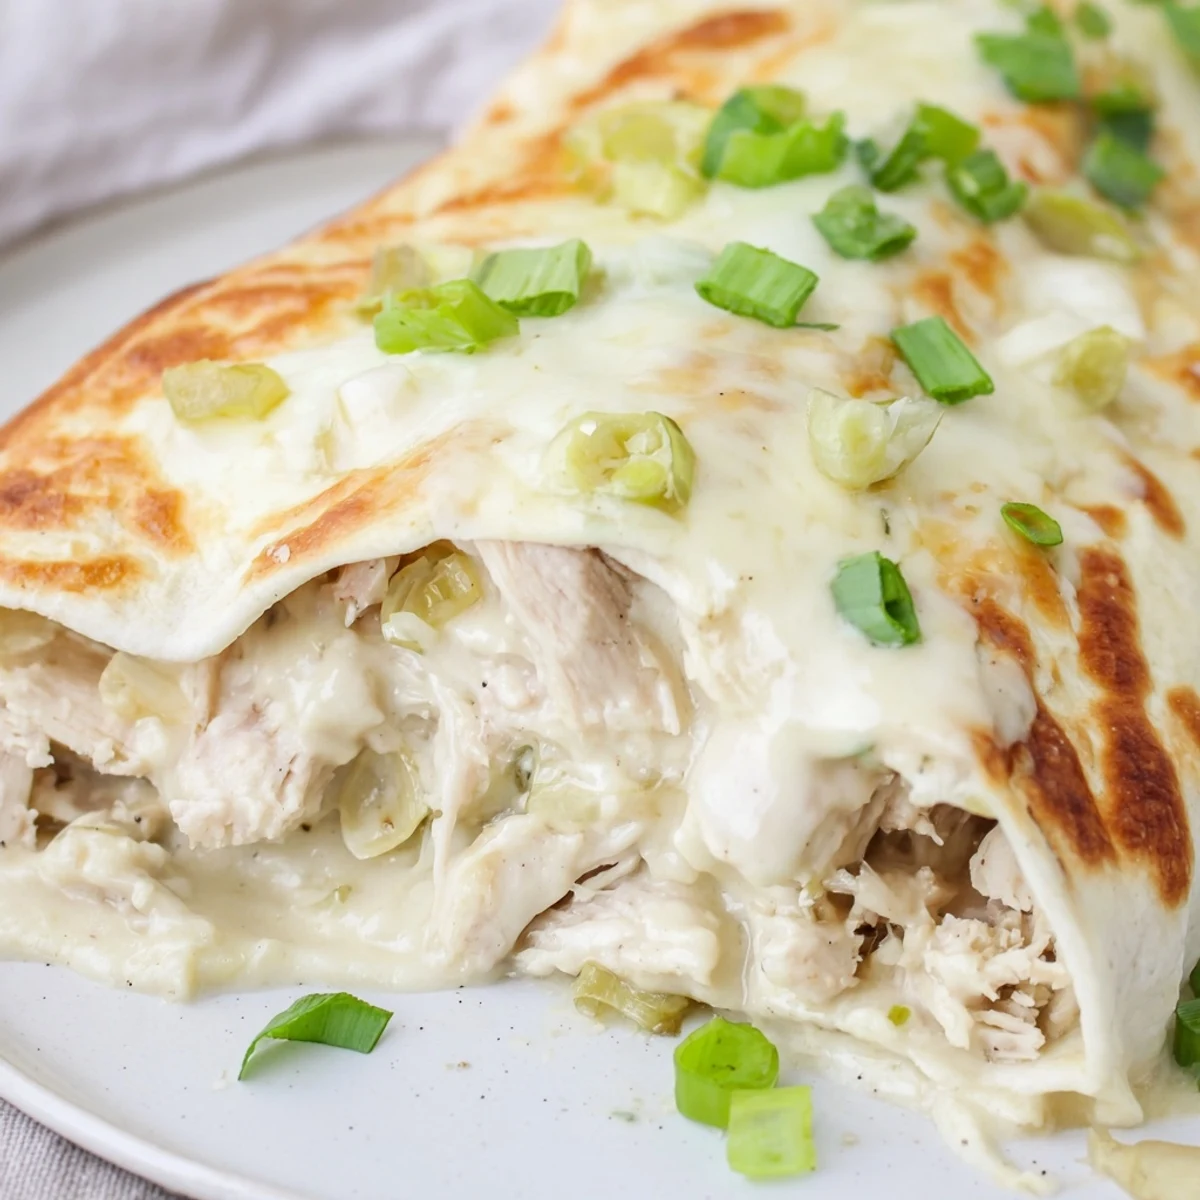
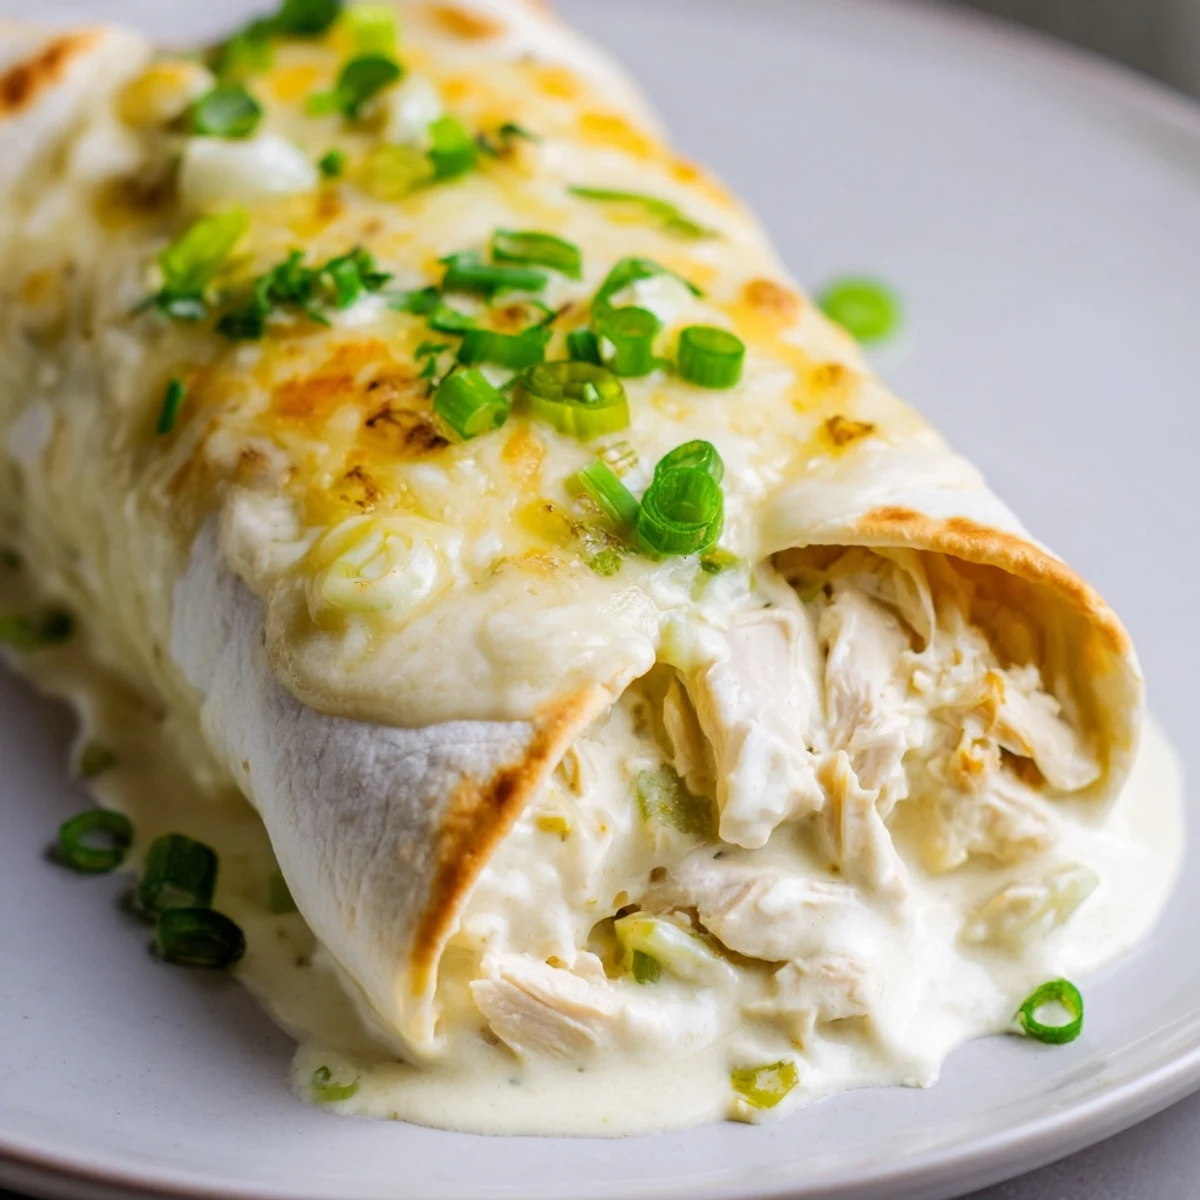
Save Shred cooked chicken and toss with Monterey Jack, sour cream, sliced green onions and spices. Make a smooth white sauce by cooking butter and flour, whisking in chicken broth until slightly thickened, then stirring in sour cream and diced green chilies. Fill tortillas, roll and arrange seam-side down, pour sauce over, top with cheese and bake 25–30 minutes until bubbly and lightly golden; serves four.
The first time I made creamy white chicken enchiladas, the kitchen was filled with the sound of tortillas crackling as I rolled them up, and the scent of green chilies mingling with melted cheese drifted everywhere. Standing there, fingers dusted with flour, I realized this dish called for a bit of playful improvisation rather than perfection. The white sauce bubbled as it hit the hot pan, coaxing me into anticipation. Even the trickiest days melt away when you’re stirring something this inviting.
I once made these enchiladas for a last-minute dinner with my neighbor, scrambling between laughter and chopping green onions while we argued about who could roll tortillas tighter. The chatter almost drowned out the timer, and when we finally pulled the pan from the oven, we all hovered impatiently for the first cheesy slice. It turned a regular weeknight into something quietly memorable. Somehow, every time I bake this dish for friends, it feels like we’re celebrating an ordinary day in the best possible way.
Ingredients
- Cooked chicken, shredded: Go for juicy rotisserie or tenderly poached—leftovers work great, but seasoning makes a difference.
- Monterey Jack cheese, shredded: The melty texture is key, and grating your own means it melts more smoothly than pre-shredded cheese.
- Sour cream: Adds tangy creaminess to both filling and sauce, and full-fat always tastes richer.
- Green onions, finely sliced: They bring a fresh bite and a touch of color—save some for garnishing the top at the end.
- Garlic powder: A little packs plenty of flavor, blending right into the filling.
- Ground cumin: Just enough to give that earthy warmth, not so much that it dominates.
- Salt and black pepper: Seasoning brings everything to life—taste as you go, especially if your chicken is already seasoned.
- Unsalted butter: Essential for starting the creamy roux base, so nothing gets too salty at the start.
- All-purpose flour: Helps thicken the sauce; whisk thoroughly so there’s not a single lump.
- Chicken broth: Adds savory depth to the sauce—use a low-sodium version if possible.
- Diced green chilies: Mild heat with a peppery tang; drain them well so your sauce stays thick.
- Onion powder: Blends smoothly into the sauce for that familiar comforting flavor.
- Flour tortillas: Soft and rollable, much easier to work with than corn for beginners (but corn tortillas work if you want a more rustic vibe).
- Cilantro and extra green onions, for garnish: A sprinkle on top brings the whole dish to life just before serving.
Instructions
- Prep Your Tools and Oven:
- Set your oven to 350°F (175°C) and lightly grease a baking dish so nothing sticks later on.
- Create the Chicken Filling:
- In a big bowl, toss together the shredded chicken, cheese, sour cream, green onions, garlic powder, cumin, salt, and pepper, using clean hands or a sturdy spoon to mix everything gently but thoroughly.
- Start the White Sauce:
- Melt butter in a saucepan over medium heat—the kitchen will smell rich and buttery—then sprinkle in flour, stirring until you get a smooth paste that bubbles softly (but don’t let it brown).
- Build the Sauce:
- Slowly whisk in the chicken broth, stirring constantly until the mixture thickens into a glossy base in about 3 minutes.
- Add Creaminess and Flavor:
- Take the pan off the heat, then whisk in sour cream, green chilies, onion powder, and salt until you have a smooth, slightly green-tinted sauce.
- Fill and Roll:
- Spoon the chicken filling evenly onto each tortilla, rolling each up snugly before nestling them seam-side down in your baking dish—the trick is to roll tightly but not split the tortillas.
- Sauce and Cheese:
- Pour the creamy white sauce evenly over your rolled tortillas, then shower the top with the last cup of cheese.
- Bake:
- Bake uncovered for 25 to 30 minutes, watching for the cheese to melt and start turning a little golden around the edges as the house starts to smell incredible.
- Finish and Serve:
- Let the enchiladas cool for a few minutes, then scatter fresh cilantro and green onions on top before serving while everything’s still warm and gooey.
 Save
Save There’s a picture I love from one rainy weekend when my friend’s toddler helped me roll tortillas for these enchiladas, her chubby fingers determinedly folding the edges—of course, most fillings landed on the counter, but the laughter made the mess worth it. That moment turned a recipe into a tradition, and now every time I make these, I remember how food brings even the smallest hands (and biggest smiles) to the kitchen.
Making Your Enchiladas Stand Out
I’ve learned that freshly shredded Monterey Jack cheese not only melts better, but turns the top golden in bubbling patches that look restaurant-worthy. If you want more punch, you can add a finely chopped jalapeño to the filling—just be sure to taste as you go. Sometimes, I even swap a third of the cheese for pepper jack, which keeps everyone guessing what makes it so special.
Changing Up the Fillings
One time I mixed leftover roasted veggies into the chicken, and it turned the meal into something completely new. You don’t have to stick strictly to chicken—try slow-cooked pork or a smattering of black beans for texture. The key is keeping the filling moist enough so the enchiladas don’t dry during baking.
Simple Serving Ideas
A side of Spanish rice or a zesty green salad cuts through the richness, and I’ve found that serving straight from the baking dish encourages everyone to dig in family-style. If you have a little fresh salsa or guacamole, a dollop on the side brightens every bite. Don’t forget plenty of napkins—the cheesy sauce gets everywhere fast!
- Warm tortillas before filling to prevent cracking.
- Let enchiladas cool slightly before slicing to keep everything tidy.
- Leftovers are even better the next day—just reheat gently.
 Save
Save Cooking these enchiladas feels like inviting comfort to the table every time. I hope your kitchen fills with the same easy warmth and happy chatter—after all, that’s the best ingredient of all.
Recipe FAQs
- → What chicken works best for the filling?
-
Use rotisserie for extra flavor or poached chicken for a milder, moist filling. Shred finely and pat dry to avoid a soggy filling.
- → How do I prevent the white sauce from separating?
-
Whisk the sour cream in off the heat and avoid high heat after adding it. Tempering by stirring in a little warm broth first helps keep the sauce smooth.
- → Can I make this ahead and reheat?
-
Assemble and store covered in the fridge for up to 24 hours. Bake from cold, adding a few extra minutes to reach bubbling and golden edges.
- → Any tips for extra texture or heat?
-
Use corn tortillas for a firmer bite or add chopped jalapeño to the filling. Finish with chopped cilantro and green onions for fresh contrast.
- → What cheeses work well here?
-
Monterey Jack melts smoothly and complements the green chilies; mild cheddar or a blend with Oaxaca or mozzarella are good alternatives for extra pull.
- → How should leftovers be stored and reheated?
-
Cool completely, cover and refrigerate up to 3 days. Reheat in a moderate oven at 350°F until warmed through to preserve texture better than the microwave.
